
Have you read Saxophone Basics - Which reed should I use? If not, then take a look by clicking the link before continuing to read -
How to set up your reed
Please note that depending on the type of equipment you have, some of the information may vary. It is important to make sure you are going to an instructor for lessons so that you do not form bad habits.
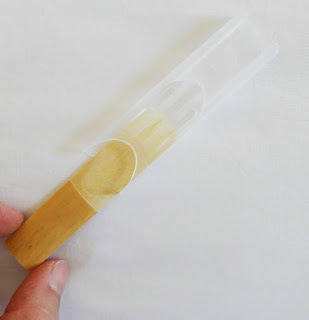
Now that you have your reed, you are ready to begin. The reed is very sensitive and it is easy to tear the tip. For this reason, I tell my students to handle the reed at the thicker end and the sides.
Steps to attaching reed to mouthpiece:
1. Carefully take the reed out of it's packaging and place the thinner part on your tongue, to moisten the reed, then turn it upside-down and do the same thing on the opposite side. Do this all by handling the reed at the thicker end. You will find that when the reed is new it has a strange taste. This will fade as you use it. If you prefer, you may want to soak the reed in a cup of water.
2. Now take the mouthpiece in hand and place the ligature over the mouthpiece, keep the screws loose. Let the open part of the mouthpiece face you. (Experienced players might put the reed against the mouthpiece before the ligature, but an unsteady hand can easily slice the reed)


3. Slide the flat side of the reed against the mouthpiece, between the ligature and the mouthpiece. Again making sure to avoid touching the tip of the reed.

4. Adjust the reed until you can see the tip of the mouthpiece peaking over if looking form the front, and the reed peaking over if looking from the back. This ensures that the reed is perfectly in line with the mouthpiece. With a basic mouthpiece and relatively soft reed, this should be the optimum position for a beginner to be able to produce a sound. However, each mouthpiece and reed is different, so you might need to adjust the reed slightly higher or lower. Ask your instructor to advise if this is necessary. You should not need to adjust too much in order to produce a sound, if you find that you do need to do this, you may need a different thickness of reed.


5. Once you have the reed in place, lower the ligature to below the curve of the mouthpiece and tighten the screw or screws (the direction of the ligature and the amount of screws depends on the model of ligature that you have).

6. Now you are ready to begin playing on the mouthpiece and producing 'duck sounds'!
Look out for my next post that will explain how to position your mouth on the mouthpiece in order to produce the appropriate sound.
How to set up your reed
Please note that depending on the type of equipment you have, some of the information may vary. It is important to make sure you are going to an instructor for lessons so that you do not form bad habits.
Now that you have your reed, you are ready to begin. The reed is very sensitive and it is easy to tear the tip. For this reason, I tell my students to handle the reed at the thicker end and the sides.
 |
| The bottom part is thicker and the top part tapers off to the end |
Steps to attaching reed to mouthpiece:
1. Carefully take the reed out of it's packaging and place the thinner part on your tongue, to moisten the reed, then turn it upside-down and do the same thing on the opposite side. Do this all by handling the reed at the thicker end. You will find that when the reed is new it has a strange taste. This will fade as you use it. If you prefer, you may want to soak the reed in a cup of water.

2. Now take the mouthpiece in hand and place the ligature over the mouthpiece, keep the screws loose. Let the open part of the mouthpiece face you. (Experienced players might put the reed against the mouthpiece before the ligature, but an unsteady hand can easily slice the reed)


 |
| Although it looks easier to assemble this way first, your reed may be sliced when placing the ligature in position. |
3. Slide the flat side of the reed against the mouthpiece, between the ligature and the mouthpiece. Again making sure to avoid touching the tip of the reed.

4. Adjust the reed until you can see the tip of the mouthpiece peaking over if looking form the front, and the reed peaking over if looking from the back. This ensures that the reed is perfectly in line with the mouthpiece. With a basic mouthpiece and relatively soft reed, this should be the optimum position for a beginner to be able to produce a sound. However, each mouthpiece and reed is different, so you might need to adjust the reed slightly higher or lower. Ask your instructor to advise if this is necessary. You should not need to adjust too much in order to produce a sound, if you find that you do need to do this, you may need a different thickness of reed.

 |
| If you look carefully, you can see the reed tip. |

5. Once you have the reed in place, lower the ligature to below the curve of the mouthpiece and tighten the screw or screws (the direction of the ligature and the amount of screws depends on the model of ligature that you have).

6. Now you are ready to begin playing on the mouthpiece and producing 'duck sounds'!
Look out for my next post that will explain how to position your mouth on the mouthpiece in order to produce the appropriate sound.
No comments:
Post a Comment